How to use the plugin
Everything you need to go from a fresh install to a complete inventory of your site's assets, cookies, and external domains.
Install the plugin
Nahnu Asset Scanner installs like any other WordPress plugin. No API keys, no account, no external dependencies to set up first.
Once activated, Asset Scanner appears as a top-level menu item in your WordPress admin sidebar. No setup wizard, no onboarding.
Configure settings
Before running your first scan, visit Asset Scanner > Settings. The most useful thing here is updating the two optional cookie databases. The plugin ships with a bundled database, but fetching the external ones adds significant coverage.
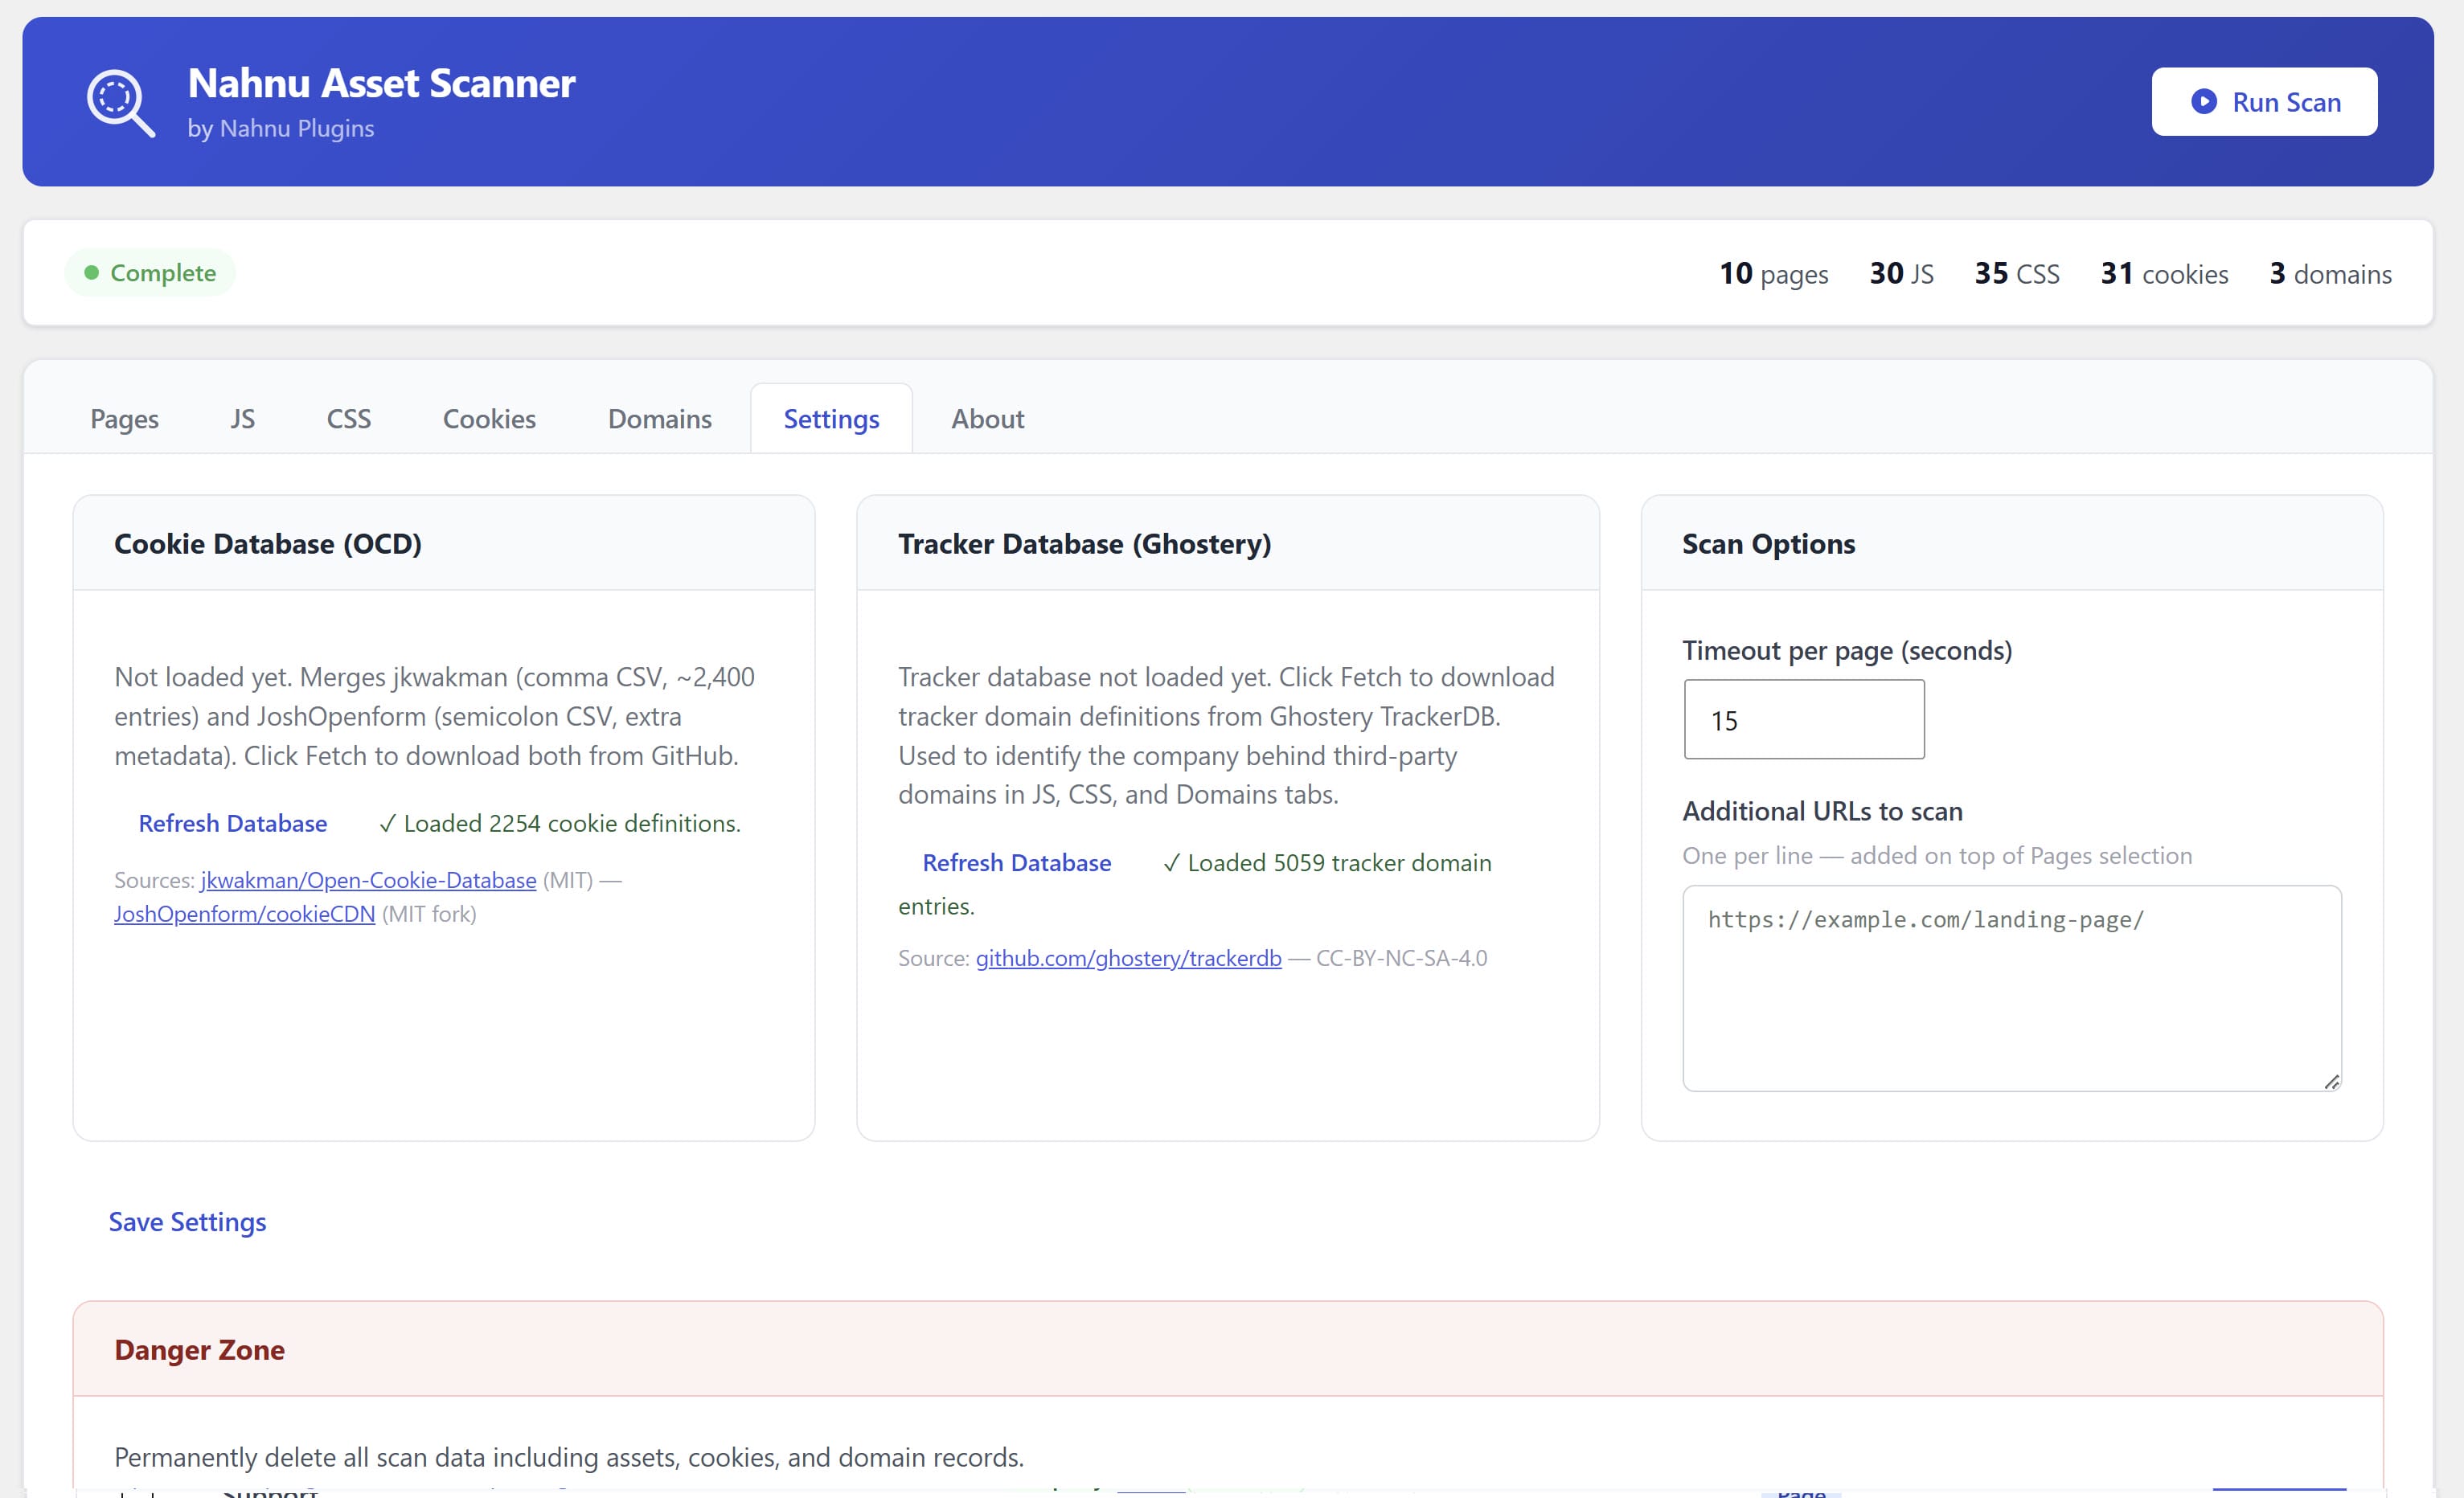
Both databases are optional. The plugin works without them. Fetching them improves cookie categorization accuracy and enables the Domains tab enrichment. Each fetch is a single manual action. The plugin makes no background network requests.
Fetch both databases before your first scan. It takes about ten seconds and you will not need to do it again until you want to update them.
Select pages to scan
Go to Asset Scanner in your admin menu. The main screen shows a list of your site's pages. Check the ones you want to include in the scan. You can scan up to 10 pages at a time and run as many scans as you need.
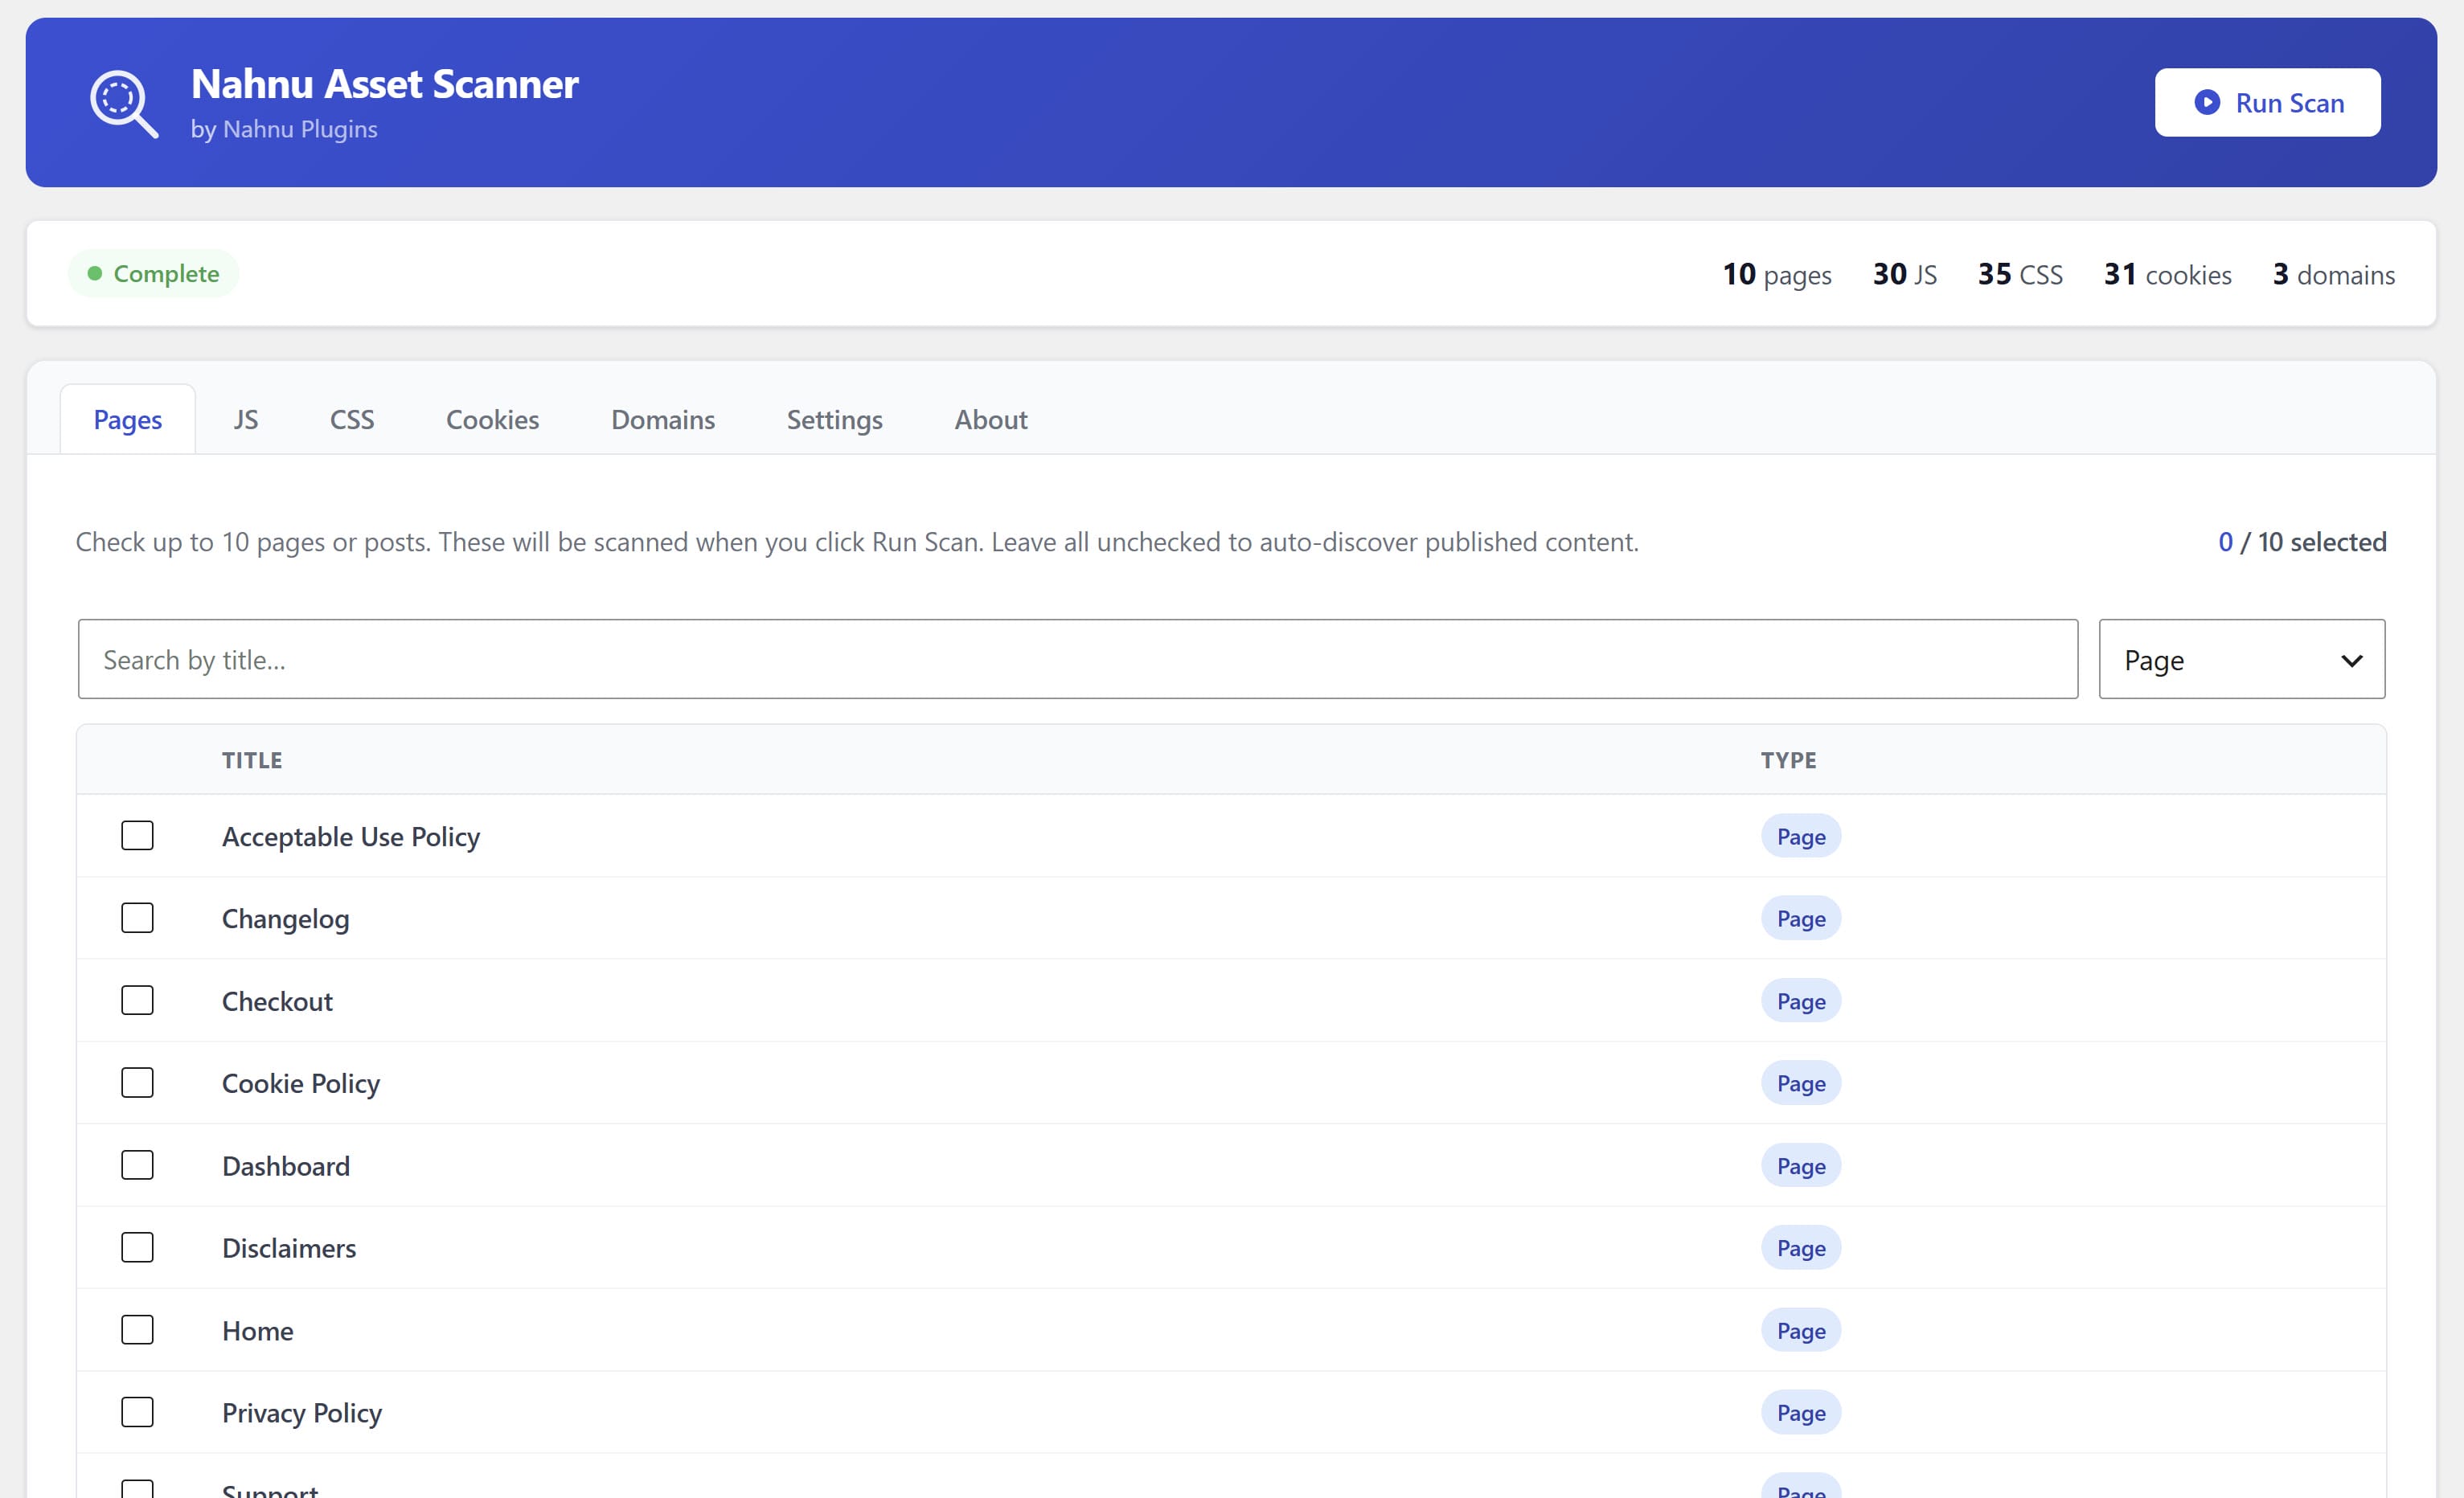
Which pages should you pick? Start with the ones that matter most: your homepage, shop or pricing page, and checkout. Different page templates load very different sets of scripts and cookies.
Pages behind a login are not scanned. The scanner visits each URL as an unauthenticated guest. Membership-gated pages and login-required checkouts will return limited results.
Run the scan
Click the Run Scan button. The plugin visits each selected page on your server and collects everything it finds: scripts, stylesheets, cookies, and external domain calls. Results are stored in your database as each page finishes.
The scan runs entirely on your server. No data is sent to any external service. The scanner makes HTTP requests to your own pages and stores all findings in your WordPress database.
Scan stalling? Your server's PHP execution time limit is likely too short. Try scanning fewer pages per run, or ask your host to increase the max_execution_time PHP setting.
Read the results
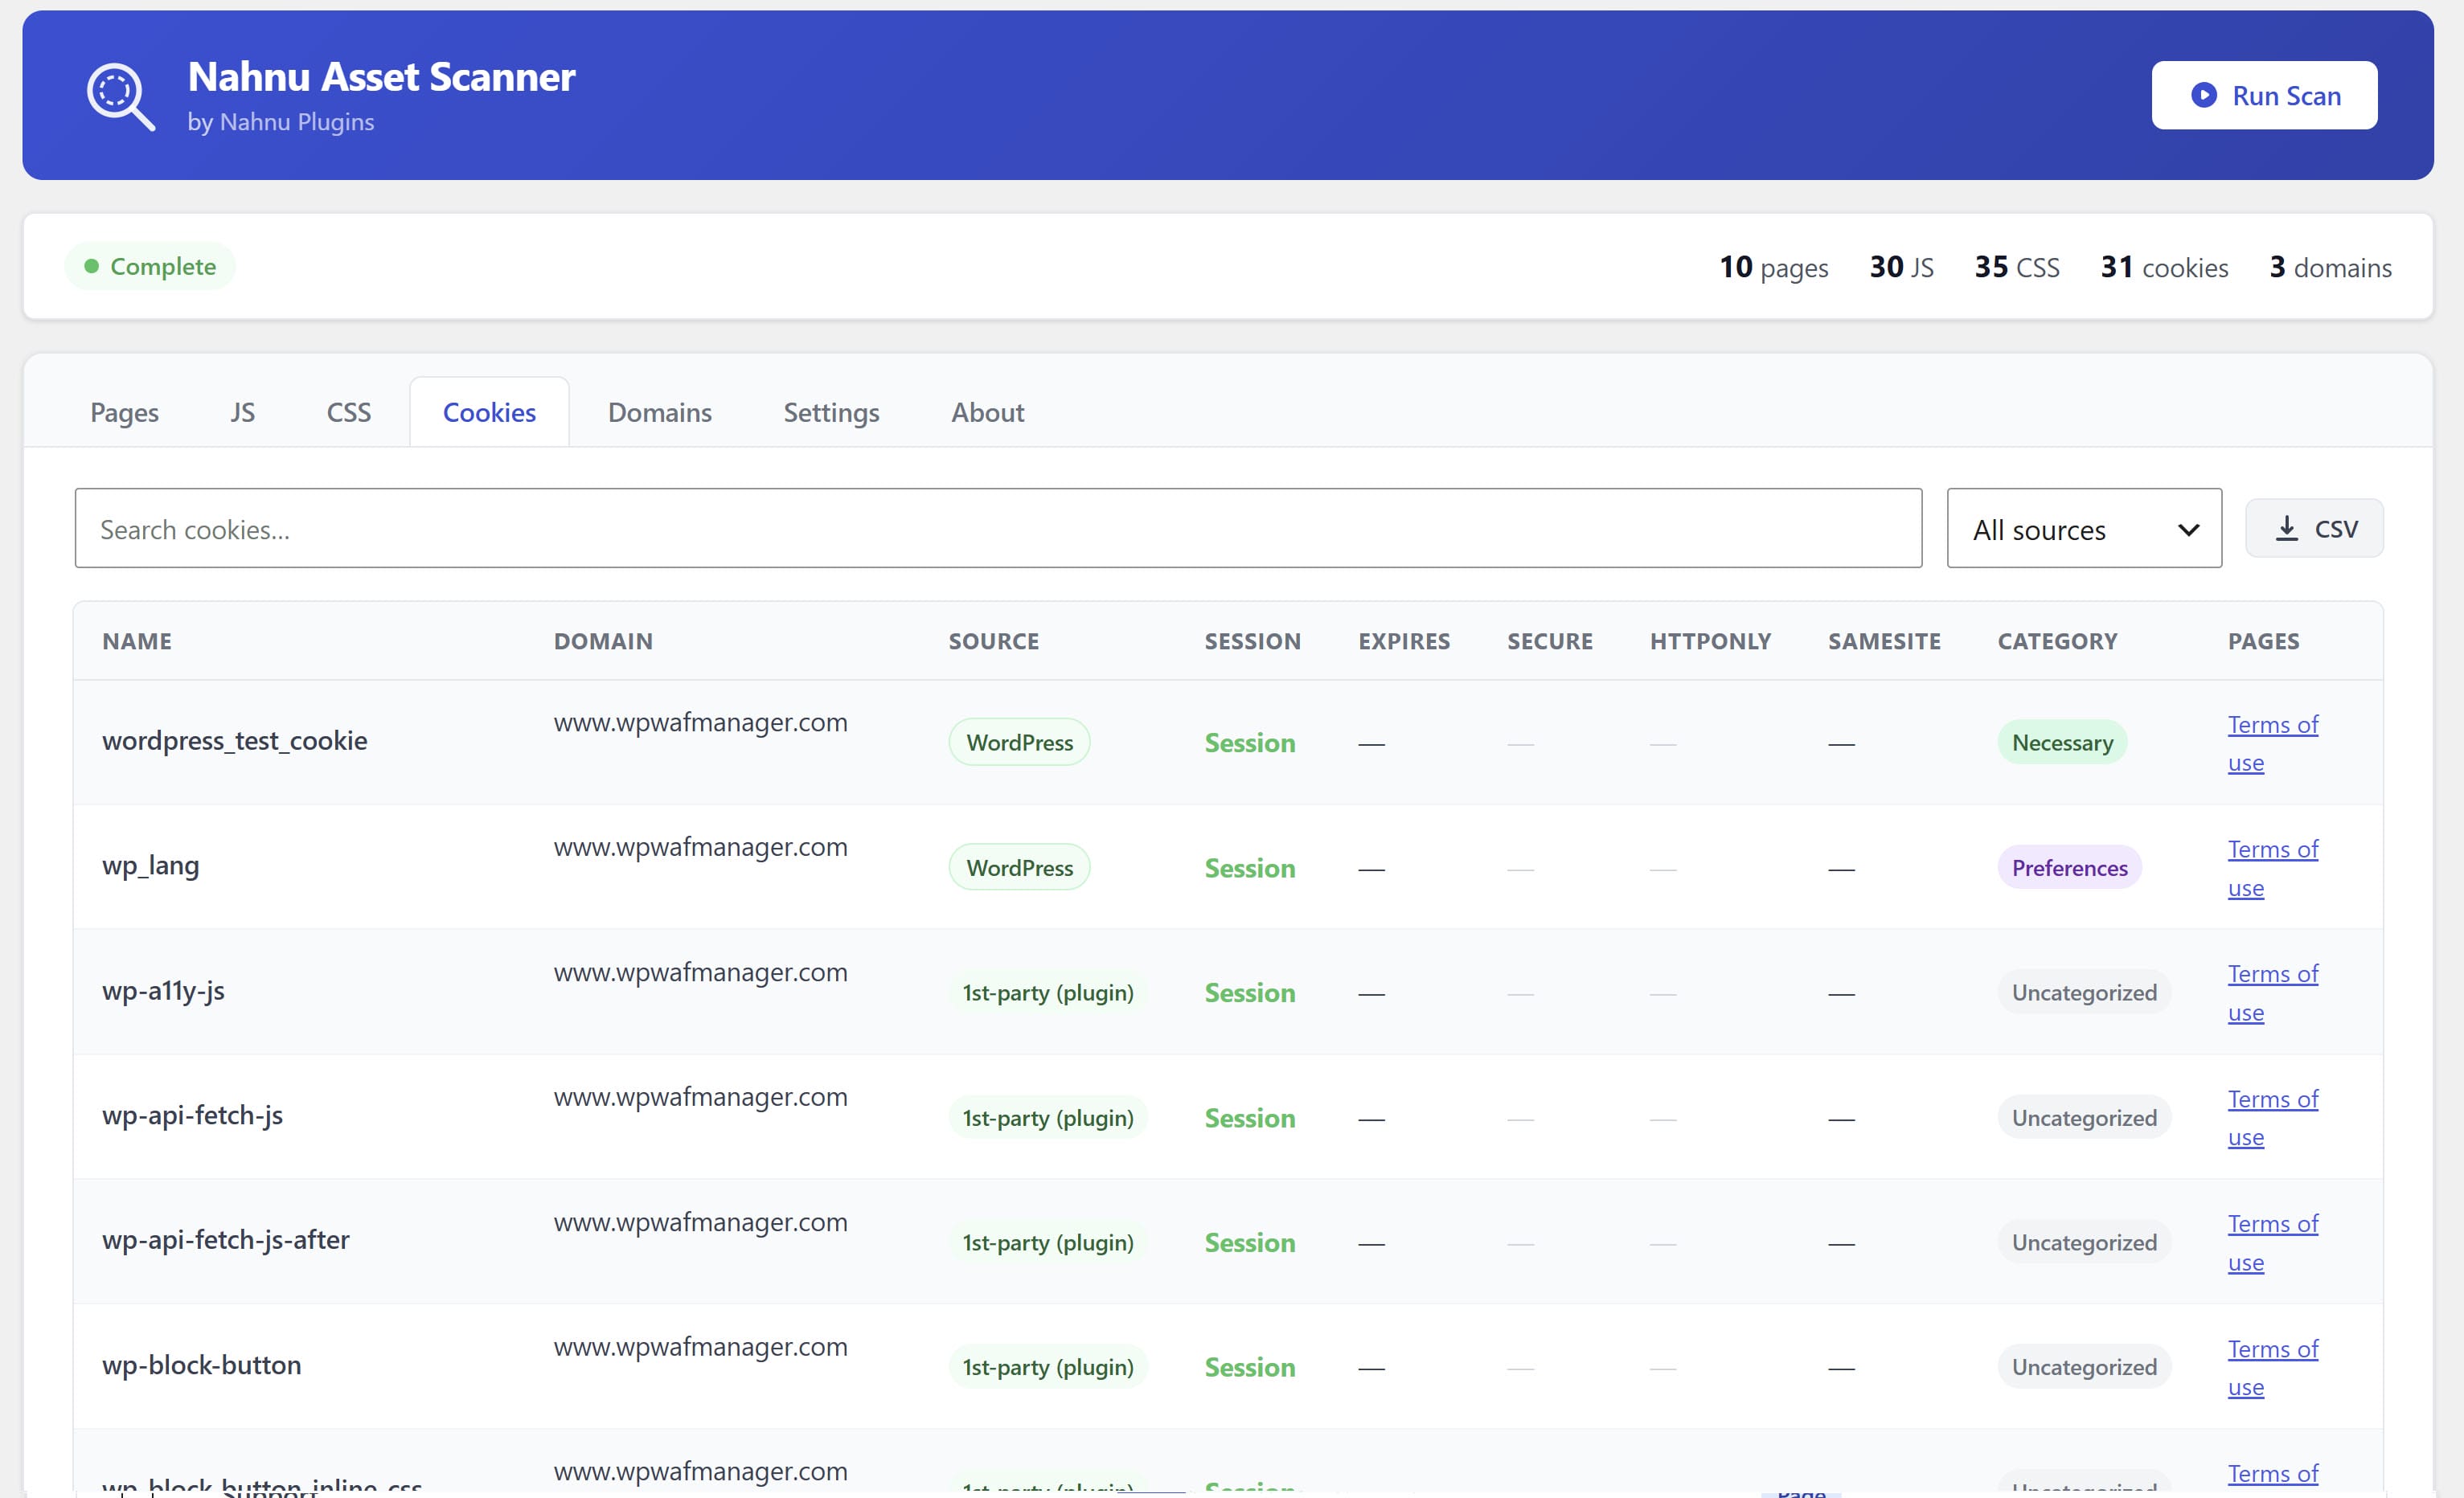
Once the scan finishes, results are shown across four tabs. Each tab covers a different category of asset. You can filter and search within each tab.
Cookies set after user interaction will not appear. The scanner captures what is present on initial page load only. Cookies set after cart actions, consent, or login require manual inspection in your browser's DevTools.
Export your data
Each tab has an Export button. Click it and the results download as an Excel file. Open it in Excel, Google Sheets, or Numbers and use it however you need.
Re-scan after major plugin changes. When you install, remove, or update plugins, run a fresh scan. Assets and cookies can change with plugin updates and your cache exclusion lists may need updating.